
Sometimes, I have a tendency to take having a handy husband for granted. Scratch that. Sometimes, I have a tendency to take having a handy husband who succumbs to my every whim for granted. So, what did I make Bubba do this time?
Well, it all started about three months ago on one of my evening blog runs. I was just making the rounds and minding my own business when I stumbled upon this beauty:

…and Holy crap. I was infatuated. No, no, let’s call it like it was: I was in love. I decided right then and there that I simply could not live without a built-in spice rack, and come Hell or high-water, I was going to have one in my kitchen.
Convincing Bubba to make me things is actually pretty easy once I threaten to tackle the project on my own. Usually, the closer I get to the point-of-no-return (i.e., cutting something from or ripping something off of the house), the more eager he is to offer his help. Smart man, that Bubba.

Anyway, I started on my way with an old newspaper and some masking tape, and mocked up my space on the wall. The size and location of our new storage solution was determined by a number of considerations. The first, of course, was the number of spices in our cupboard (twenty-nine). Second, I needed something that was going to anchor the microwave on the adjacent wall. Too small would look silly.. too large, overpowering. Third, we had to deal with the stud (no, not Remy). You might notice the thick division between the two sides of my inspiration picture. That’s their stud. Nice and square and in the middle. Mine? A sweet twelve inches from the other side of the wall. The way I saw it, we had two options: building a rack in the sixteen inches between that stud and the previous, or building an asymmetrical rack. Heck, symmetrical is boring, and I sent Bubba on his way:

Yep, that’s one sixteen-inch shelf between the first two studs, and another five or so for a little pizzazz on the other side. Pretty, huh? I wish I could tell you that we decided on this particular placement after pouring over a wide array of sketches, mock-ups, and a thorough discussion regarding the golden ratio. But for better or worse, like most of our projects, it was good old-fashioned improvisation. One day, it’ll bite us in the rears.
Once we had our space defined, we were set to get to work on the shelving structure. We built two boxes using 1/2” x 2” wood for the perimeter, and 1/4”x2” wood for the shelves. On the back, we used some cheap, unfinished wainscoting. Because the larger side of the shelf would house the majority of our collection, we measured three precise shelves based on what we had. The other side was made to complement the first, and we opted for a four-shelved structure, and would find its fillers as the space dictated. By the end of day one, we were left with two pretty boxes shoved haphazardly into some shaggy sheetrock:
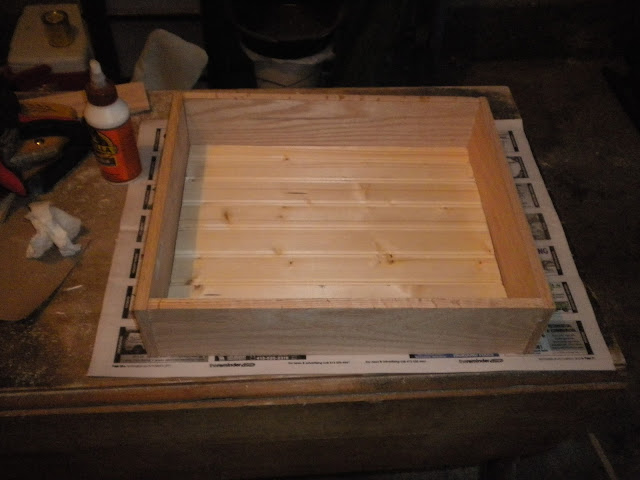

Truth be told, I’m a little smitten with even the unfinished product in picture #2, something I undoubtedly get from my dad, whose endearingly half-done projects are all over my childhood home. In fact, I’m surprised it took as little time as it did to transition from picture #2 to picture #3.. all it took was some crown molding for trim and the same creamy white paint we’ve used on our cabinets and every other surface in our house:

Luckily, we are thrilled with the size and placement, and the new rack brings a certain always-been-there quality to the kitchen. It feels fancy and custom and right at home. Take a look at this baby all filled up:

Should have straightened out that Rosemary. But otherwise, gorgeous, no? If poor Bubba wants a break from projects, he’s going to have to stop putting out such a nice product. One, sad day… he’ll learn.